About Me

My photo
Pacific Northwest, United States

Welcome

I've been crafting things for myself and others since my teen years. Designing and creating is not just what I do.....it's Who I Am. Thanks for stopping by.

Friday, October 30, 2015

Stars-N-Stripes QOV #5

This week I finished up my latest Stars-N-Stripes design for Quilts of Valor.  I started with my first design and then made changes to the center portion of the quilt.
QOV Stars-N-Stripes design #5
 After constructing all the blocks, I laid them out on my design cloth and was prepared to sew them together.  But, the center seemed too blue.  That's probably because I used a dark almost solid blue.  After letting it set for a while ( a week or more) I decided to change those blocks and add some of the multi-colored fabric that I planned to use for the outer border.  


This quilt top measures 63" x 81".  All 35 blocks finish at 9-inches square. 

I'm linking up with:

Please check out these links to see what others have been working on this week.

Thanks for stopping by....and...Happy Quilting!!!
   ~Diane


Monday, October 26, 2015

Sunbonnet Sue's Make Over

Last night I worked on correcting the fuzzy shoe problem I had with the first couple of Sue's that I digitized.  Somehow I had gotten the stitches off so that the satin cover stitch did not actually cover the edge of the shoe fabric.  I also made a new version with her hand extended outward instead of down.

Sunbonnet Sue - #3

In my hunt for Sunbonnet Sue images on line I had seen several that had an apron.  Little girls at the time of Sue's creation by some awesome quilter often wore aprons over their dresses.   I thought it would be fun to try my hand at adding an apron.  I imported an image that I wanted to use and then digitized each applique and embroidery item.  The shape of the hat also changed in this newer version.
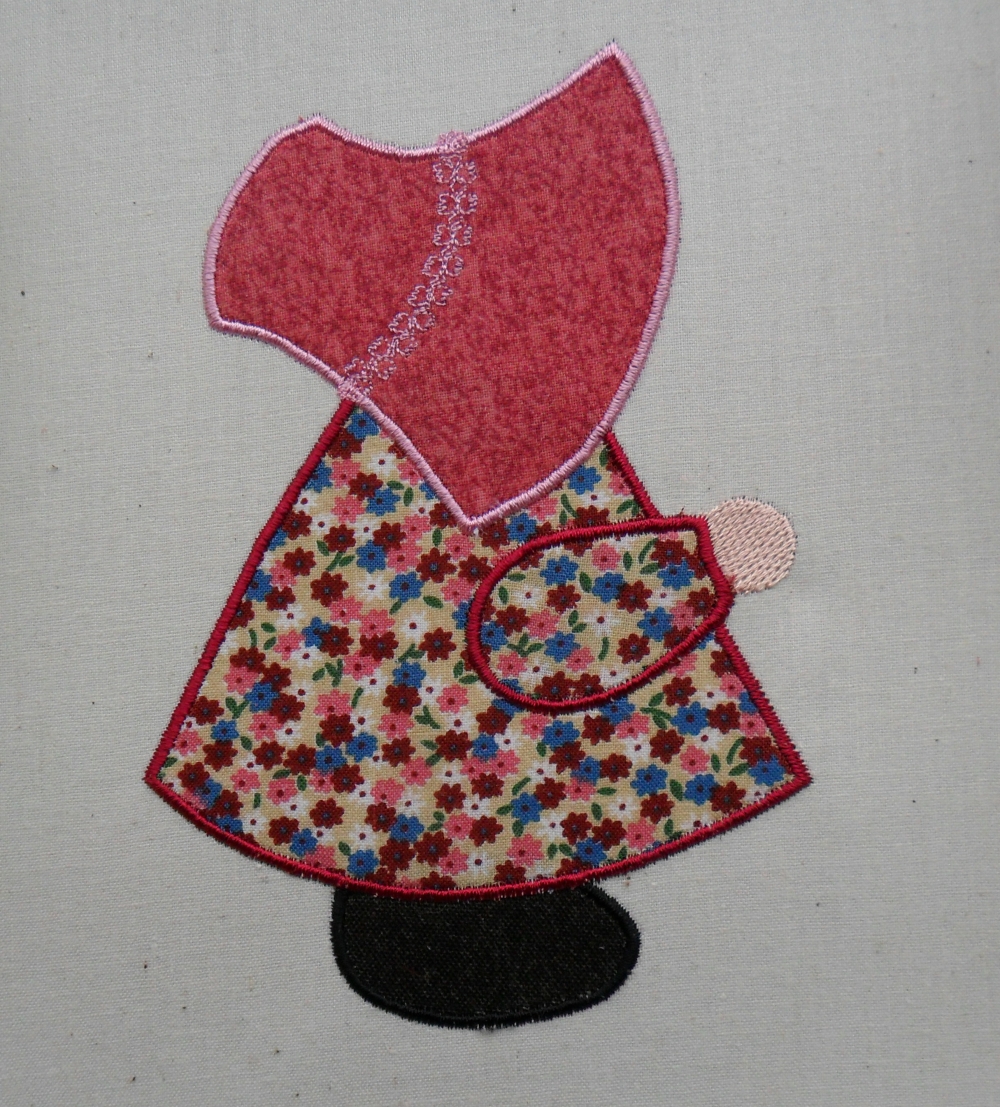
Sunbonnet Sue - #4

I'm happy with how she turned out, even the lace on her hat.
These Sue's were stitched on an unbleached muslin background with RinsAway water soluble tear away backing in a 5" x 7" hoop.

I'm hooking up with:
 Design Wall Monday at Patchwork Times
 Main Crush Monday at Cooking Up Quilts

Thanks for stopping by......and......Happy Quilting!!!

    ~Diane  


Friday, October 23, 2015

Coleen's Quilt Top - completed

In 2013 I made a scrappy mystery quilt that my friend, Coleen, liked about as much as I did.
I posted about the making of that quilt here and here and quilting it here.

 I held onto the quilt until I gave it to another friend whose house burned down.  It made my heart feel good to give it to someone in need.  And let's face it, when your house with all your belongings burns up, you need everything.  

When Coleen heard I had given the quilt away she pouted and said she had wanted that quilt.  That's when I decided to make one especially for her.  


EQ7 Design - Coleen's Quilt


This past summer I finished cutting and piecing the blocks for the interior of the quilt.  Unlike the first version I thought it would be nice to add a scrappy square border as well.  


Coleen's Quilt Top with borders

The quilt top measures 65-1/2" x 81-1/2".  Top completed October, 2015.

Thanks for stopping by today.  I welcome any comments or suggestions that you may have.

I'm linked up with:


Happy Quilting,

       ~Diane


Monday, October 19, 2015

Sunbonnet Sue Applique

I've had my Brother Ellure embroidery/sewing machine for over a decade now and have done very little embroidery with it.  Mostly I use it for piecing, quilting, and sewing knit garments.  Recently I made a list of things I would like to accomplish and one of the items on that list is learn to digitize.  When I bought my machine I also purchased Palette digitizing software, but only worked with it for a few months.  Now, I'd like to revist the process of creating emboideries and appliques; and, since it's been so long, I'm going to have to start my education all over.  

Today I worked on creating a Sunbonnet Sue applique.  That is one of the quilts on my "to do someday" list so now's as good a time as ever.  It took me a while of reviewing my instructions book and tutorials to figure out just how to make the three pieces for this design.  The design I found had extra pieces for the hand and sleeve, but I thought it best to skip that for now.  I made the shoe, dress, and hat.  I was pleased with the stitch-out, but she just didn't look complete.  Next I digitized her hand as a fill stitch and then the sleeve as a satin stitch outline.  Lastly, I chose a motif stitch for the lace on her bonnet.


Sunbonnet Sue #1


A while back a friend gave me a whole bunch of fabric bits and pieces that had been used by someone else for crafts like placemats, etc.  Most of the colors are very 80's.....country blue, taupe, orange, and green.  I haven't been able to incorporate those fabrics into any of the quilts I've made lately, but this project is perfect.

I enjoyed digging through all the fabric bits and picking out ones that would look good as the dress and then find a complimentary or contrast fabric for the bonnet.  My assortment of embroidery thread is somewhat limited so I just picked colors that I thought would go well with the fabric.  

I'm not sure I like the sleeve the way I have it.  It might look better to make it a separate piece of fabric, but I don't know that I want to have to trim that small of a piece before stitching the satin stitch outline.  Perhaps I'll do another file and play with that idea.

Sunbonnet Sue #2
The thought of having all the Sues facing the same direction led me to create a second file where I mirrored the design.  
Sunbonnet Sue #3


At this point I'm not sure how many of these Sues I will make or how I will use them in a quilt.  That will be work for another day.  

Thanks for stopping by.
Linking up to:  Design Wall at Patchwork Times and Main Crush Monday at Cooking Up Quilts.

Happy Quilting

~Diane

Related Posts Plugin for WordPress, Blogger...