About Me

My photo
Pacific Northwest, United States

Welcome

I've been crafting things for myself and others since my teen years. Designing and creating is not just what I do.....it's Who I Am. Thanks for stopping by.
Showing posts with label Quilting. Show all posts

Monday, January 30, 2017

Scrap Stars and 16-Patch

A few weeks back I made a scrappy star block featuring a scrappy four patch center surrounded by scrappy flying geese units.  The finished blocks will measure 8 inches square.  
 

This morning I finished making the last of the 24 scrap star blocks I need for the quilt I have designed. 
 
After sketching some design ideas, I came up with a sashing design that I think will make a nice bridge between the scrap star blocks and the scrappy 16-patch blocks.  Scrappy flying geese, white background squares and scrappy cornerstones.  

I have begun cutting the patches I need and have made a few of the flying geese units as well.  I used them as leaders-n-enders when sewing together the star blocks. 
 
 
After all my excitement about finishing the star blocks, I counted up the 16-patch blocks.  I still need to make 11 more of these gems.  That means more square hunting and cutting in the near future for me.   Thank goodness I spent a couple hours this weekend stripping my way through a sizeable pile of fabric leftovers and scraps. 
 

Well, that's what I've been up to for the past few days.  Thanks for stopping by.

Happy Quilting,
  ~Diane

Monday, January 9, 2017

Quiltville Mystery Part 7

Last week I posted my Part 6 progress. 

I began working on this final phase, Part 7, of the Quiltville En Provence mystery quilt on New Year's Day holiday.  It didn't take long to cut the patches needed to construct the hourglass units.  Over the course of a couple of days, sewing here and there, I was able to get all the units made and trimmed to size.  
I spent some time calculating exactly how many units I needed to make a rectangular quilt.  Instead of using Bonnie's block layout of 4 x 4, I decided to make mine 3 blocks across and 4 blocks down which should measure out to be about 69"  87" if all goes according to plan.

I laid out all the patches for one block and one sashing.


Because we've had some nasty weather, I was able to spend more time sewing this past weekend.  I got all the blocks and sashing strips assembled and began connecting everything into rows.
 

I'm hoping to get this top completed by the end of the week.
 
I'm linking with Mystery Monday Linkup.   Check it out.  There are a lot of creative quilters out there making some awesome quilts.
 
Thanks for stopping by.  Feel free to leave me a comment.
Happy Quilting,
   ~Diane


Monday, January 2, 2017

Scrappy Star Block

My fabric scraps are getting way out of control!  I have more than I can keep track of.  It's time to make a plan to get rid of them without throwing good fabric away.  So.....SEW!

In the past I've made several scrappy quilts.  One of the patterns used 16-patch blocks.  These blocks are made from leftover 2-1/2" squares.  
 
This is a pic of the second quilt I made using the same pattern.  

I have been exploring ideas for using these blocks in new ways and have a couple ideas rambling around in my head.  I know I have a bunch of these made up already, but not sure where they are at the moment, so I made a couple more yesterday.
 
 Start by making 4-patch units and then connect four units together to make the 16-patch block.    
Not long ago I saw a QOV (Quilts of Valor) quilt top made with all scraps.  The featured block in the quilt was a star using a 4-patch unit in the center surrounded by flying geese units.  I made some flying geese units with dark batiks for the triangles to go with my 4-patch units before cutting the background squares for the corners. 
Here's my first scrappy star block.  It measures 8-1/2".  I'm liking how it looks.

After I make several more of these star blocks I will play around with alternate blocks and sashing configurations.  Looking forward to putting these into a quilt.
 
Thanks for stoppy by today.  Feel free to leave me a comment.  
Happy Quilting!
   ~Diane

Quiltville Mystery Part 6

I was able to download the Quiltville En Provence Mystery Part 6 on Friday, but did not get to work on it until Saturday, New Year's Eve.  According to my calculations, I needed to make 48 of the required 64 units.  I ended up making 50 units.

I followed Bonnie's instructions and stacked four strips of the required colored fabrics before cutting the triangles I needed with my Easy Angle ruler.  That sure made it easy when I got to the sewing machine.  Each pair of fabrics were all ready right sides together, so all I had to do is chain piece them.  I'll have to try to remember this method for next time I cut and sew units like this.  

Here's one way to assemble these units to make a block.  I'm sure Bonnie has a better idea for placing these in the quilt.
Much to my surprise when I went to Bonnie's site to join in the Mystery Monday Linkup, I discovered that there is no linkup this week.  She posted Part 7, which is the final part and quilt assembly instructions.  Needless to say I have some cutting and sewing work to do this week.

Thanks for stopping by and Happy Quilting!
   ~Diane


Monday, December 26, 2016

Quiltville Mystery Part 5

Thursday night I discovered that Bonnie Hunter had released her Part 5 clue for the En Provence Mystery Quilt a day early.  I quickly downloaded the instructions, but it wasn't until Saturday before I could cut the patches needed and start sewing.

I calculated that 75% of the 60 units required was about 48, so I began cutting my dark purples and neutral 3-1/2" wide strips.  After stacking a neutral strip on top of a purple strip with right sides together, I used my Easy Angle ruler to cut the paired triangles.  After I did a test of a few, I decided to go ahead and cut the dog ear corner off the pointed triangle end so I would have less to trim up after sewing.  That worked out great.  I actually had only a sliver to trim on some of my units.   I made a few extra, so now I have (52) 3-1/2" units ready to go.

I'm linking up with the Mystery Monday Linkup over at Quiltville.

Thanks for stopping by.  Hope you had an awesome Christmas.  Happy Quilting,
    ~Diane


Thursday, December 22, 2016

Quilt Suspension and FMQ

I have quilted quite a few large quilts with my domestic sewing machines and am thankful for the nice table I purchased several years ago.  The sewing machine drops down so the bed of the machine is level with the table top.  

Maneuvering a large quilt on the table and through the machine throat is a bit tricky but can be done.  This does tend to slow down the process of quilting due to stopping and rearranging the quilt in order to move to new areas to quilt.  I have heard of several ways to reduce the drag made by the quilt and recently watched a video online.  Patsy Thompson Designs.com offers for sale a system using bungie cords and clamps to raise up the bulk of the quilt.  According to her the system works well and makes moving the quilt under the needle easier.  

The first thing I did was show the video to my husband and ask him to make one for me.  He's really inventive and able to put together a lot of creative things.  But as I thought about it some more, I had an idea of a way to achieve the same effect.  I dug out the Dritz Quilter's Floor Frame from under the bed and "borrowed" some of the parts.   I already had some clamps and binder rings.  My husband gave me the small bungie cords I needed.  After making the frame, which fits well on my quilt table, I added the binder rings over the cross pvc pipe.  The bungie cord hooks attach to the binder rings and the opposite end hooks fit perfectly into the little holes in the clamp handles.  
 
  My test run on my FMQ practice quilt went well.  Elevating the quilt really does reduce the drag and makes it easier to move the quilt around as I quilt.  Re-positioning the clamps on the quilt every so often takes a little time, but so far I think its a more efficient method than rearranging the bulk of the quilt every few minutes.
 
 
The nice thing about my suspension contraption is that I can easily dismantle it and store it away when not needed. 
 
Here's a few pics of the quilting I have been doing on this practice quilt. 
I'm using yellow thread on the top and white in the bobbin.  The quilting shows better on the solid back. 
 
About this practice quilt.......I am obsessed with learning how to free-motion quilt.  I watch videos almost every day.  I have dozens of practice quilt sandwiches ranging in size from 6-inches square to 24-inches square.  
 
Several years ago I made this top and, because I never really liked it, I stuck it up high on the top shelf and forgot about it.  When I was looking for fabric and batting to make more practice sandwiches, I spotted this quilt.  I had previously sandwiched and spray basted the batting and backing to the top so it was ready to be quilted.  Now I have a very large practice piece to work on.
 
I am quilting this rather densely and using pebbles for filler in between the larger elements.  Whenever I see a new quilt stitching design to try I have a practice piece all ready to go under the needle.

Thanks for stopping by.   Happy Quilting!
   ~Diane


Wednesday, December 21, 2016

Octagon Mat and Mug Rugs


A while back I was inspired by a YouTube video featuring Karen Lukac making an octagon place mat.   


This is a pic of a table mat I made.  It measures 12-1/2" across.

My thoughts were that this shape would make a nice mug mat or coaster. 


This is one of the first mug mats I made when I was testing my technique.  To keep it simple, I opted not to put binding around the outside. 
 

For this year's Quilting with J.O.Y. Christmas party I wanted to give each of my friends a set of two matching mug rugs.  Each set was different from any other set.  I was able to use up small bits of fabric that I had in my stash.  


Here are two of the sets that I had left over and didn't give away....yet. 

 
These mug rugs begin with a 4-inch focus fabric octagon.  The contrasting pieces are cut 1-inch wide and sewn to the outer edges of the center octagon.  I used more of the focus fabric for the outer ring and cut those pieces 1-1/2" wide.  I also used the focus fabric for the backing octagon.  After making the top, I layered the backing, right sides together over the top and a thin piece of batting on top of that. Then I sewed it all together around the outside edge using a 1/4" seam and leaving an opening of about 2 inches for turning.  Next, I turned the mats inside out and top-stitched next to the outer edge to close up the opening and finish it all around.  These mug mats ended up measuring 6 inches across.


I wish I had remembered to take pics of all the other sets I made.  They were a fun, easy gift to make.  

I am linking up with Sew Fresh Quilts.

Thanks for stopping by and Happy Crafting!
  ~Diane
 

Monday, December 19, 2016

Quiltville Mystery Part 4

On Friday, Bonnie Hunter released Part 4 of her latest Mystery Quilt "En Provence".  I went online and downloaded the instructions right away.  We've had snow on the ground for several days and I don't drive when the roads are bad because I work from home.  Yeah!  So, I've had a lot of time to sew lately.  

Saturday I was able to cut the patches needed and begin constructing the units.  


In keeping with my goal to make 75% of the required units, I made 60 of these 3-1/2" square units.

After sewing the units I began trimming them down to the correct size.  At first I used my Perfect Half-Square & Quarter Square Triangles slotted trimming ruler until I sliced my finger with the rotary blade.  It was my fault for having my fingers too close to the slot where I was to cut.  The blade did not get into the groove before I started moving the cutter.  It took a few minutes with pressure to get the bleeding to stop so I could apply liquid bandaid.  It's been a long time since I made such a foolish mistake.  After that I ditched the trimmer for my regular square ruler and made certain my fingers were safe while squaring all the rest of the units.

I am linking up with Quiltville's Mystery Monday Linkup:  http://quiltville.blogspot.com/2016/12/mystery-monday-link-up-part-4.html
 
Thanks for stopping by and Happy Quilting,
   ~Diane
 

Thursday, December 15, 2016

Quiltville Mystery quilt Part 1-3

For many years I have hung back in the shadows and watched Bonnie Hunter's mystery quilts come to life.....for other people.  For the first time I have decided to go ahead and participate.  

Here is a sampling of my Part 1 units.  I made a total of 165 4-patch units which measure 3-1/2" square.


The finished quilt measures 87" x 87" and that seems a bit too big for me, so I will be making 75% of the required units to begin with.  I probably will need to make more of each unit once I decide on the quilt size I want.  

Here is a sampling of my Part 2 units.
I used the Tri Rec rulers to cut the patches.  I made a total of 75 units which measure 3-1/2" square.

Everyone who knows me knows that I love purple so it was fun to cut and sew the Part 3 units.  I made 168 of these little beauties.


Now that I have a lot of units to play with I tried my hand at guessing possible blocks we might be assembling.

 
If you are interested in making this mystery quilt, head on over to Quiltville and check it out.  It's not too late to start. 

I'm linked up:  http://quiltville.blogspot.com/2016/12/mystery-monday-link-up-part-3.html

Thanks for stopping by and Happy Quilting!

   ~Diane

Monday, November 23, 2015

More Quilts of Valor

A while back, over a year ago, I attended a small local quilt show.  There were close to a dozen quilts that all used the same pattern and I was inspired by the red, white and blue version thinking it would be a great one to make for Quilts of Valor.  

After studying the pics I took, I came up with this pattern in EQ7.

 I entitled the design "It's A Mystery" and is made with two different 12-inch square blocks.   

Here's a stack of the B Blocks before I assembled the quilt interior.  Those triangle units are not my favorite to make.  No matter how careful I am in cutting and piecing they seem to stretch and distort the entire block.  I did starch the large triangle before piecing, but in hindsight, I should have starched the side triangle, too.

Because I wanted the design to prevail, the length ended up a bit larger than I prefer.  I decided to add a small, 1-inch, border all around just to finish it off.  The quilt top measures 62" x 86".


I chose to make the borders two colors, two sides are red and two sides are blue.


At our last QOV sew-in earlier this month, I worked on combining pre-made quilt blocks.  Because we have so many people making blocks they are not always all the same size, so I had to trim these down to one common size before proceeding.


 I really like the fabric I used for the cornerstones and outer border.  
One of the gals at the sew-in dressed up the plain white stars with the embroidered "USA" in the center.  

This is the Floating Star block we often make for these quilts.  I think the USA fabric in the star center adds a lot of interest to the block.

I'm planning on submitting this top, along with some others, at our next sew-in.

Thanks for stopping by.......Happy Quilting!!!

~ Diane 


Friday, October 30, 2015

Stars-N-Stripes QOV #5

This week I finished up my latest Stars-N-Stripes design for Quilts of Valor.  I started with my first design and then made changes to the center portion of the quilt.
QOV Stars-N-Stripes design #5
 After constructing all the blocks, I laid them out on my design cloth and was prepared to sew them together.  But, the center seemed too blue.  That's probably because I used a dark almost solid blue.  After letting it set for a while ( a week or more) I decided to change those blocks and add some of the multi-colored fabric that I planned to use for the outer border.  


This quilt top measures 63" x 81".  All 35 blocks finish at 9-inches square. 

I'm linking up with:

Please check out these links to see what others have been working on this week.

Thanks for stopping by....and...Happy Quilting!!!
   ~Diane


Monday, October 26, 2015

Sunbonnet Sue's Make Over

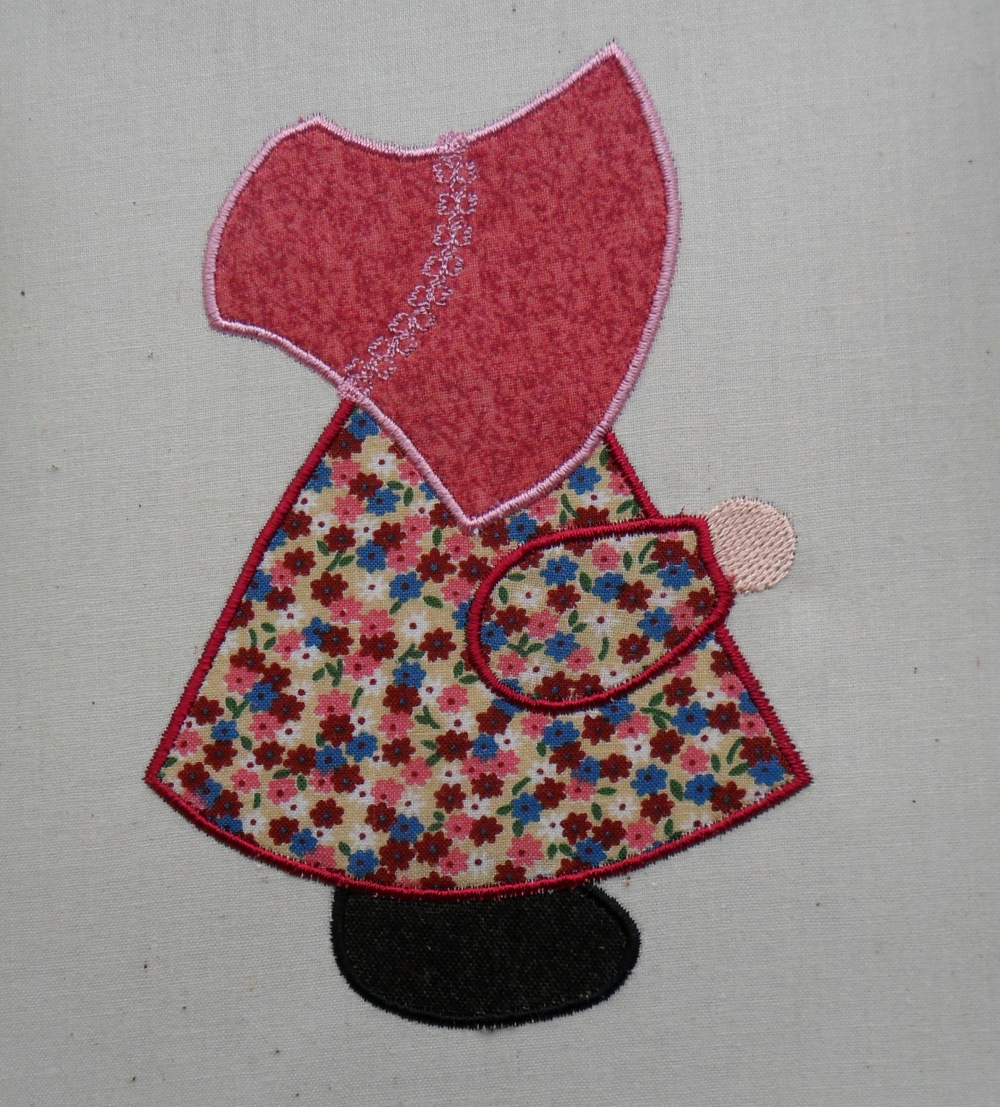
Last night I worked on correcting the fuzzy shoe problem I had with the first couple of Sue's that I digitized.  Somehow I had gotten the stitches off so that the satin cover stitch did not actually cover the edge of the shoe fabric.  I also made a new version with her hand extended outward instead of down.

Sunbonnet Sue - #3

In my hunt for Sunbonnet Sue images on line I had seen several that had an apron.  Little girls at the time of Sue's creation by some awesome quilter often wore aprons over their dresses.   I thought it would be fun to try my hand at adding an apron.  I imported an image that I wanted to use and then digitized each applique and embroidery item.  The shape of the hat also changed in this newer version.

Sunbonnet Sue - #4

I'm happy with how she turned out, even the lace on her hat.
These Sue's were stitched on an unbleached muslin background with RinsAway water soluble tear away backing in a 5" x 7" hoop.

I'm hooking up with:
 Design Wall Monday at Patchwork Times
 Main Crush Monday at Cooking Up Quilts

Thanks for stopping by......and......Happy Quilting!!!

    ~Diane  


Friday, October 23, 2015

Coleen's Quilt Top - completed

In 2013 I made a scrappy mystery quilt that my friend, Coleen, liked about as much as I did.
I posted about the making of that quilt here and here and quilting it here.

 I held onto the quilt until I gave it to another friend whose house burned down.  It made my heart feel good to give it to someone in need.  And let's face it, when your house with all your belongings burns up, you need everything.  

When Coleen heard I had given the quilt away she pouted and said she had wanted that quilt.  That's when I decided to make one especially for her.  


EQ7 Design - Coleen's Quilt


This past summer I finished cutting and piecing the blocks for the interior of the quilt.  Unlike the first version I thought it would be nice to add a scrappy square border as well.  


Coleen's Quilt Top with borders

The quilt top measures 65-1/2" x 81-1/2".  Top completed October, 2015.

Thanks for stopping by today.  I welcome any comments or suggestions that you may have.

I'm linked up with:


Happy Quilting,

       ~Diane


Monday, October 19, 2015

Sunbonnet Sue Applique

I've had my Brother Ellure embroidery/sewing machine for over a decade now and have done very little embroidery with it.  Mostly I use it for piecing, quilting, and sewing knit garments.  Recently I made a list of things I would like to accomplish and one of the items on that list is learn to digitize.  When I bought my machine I also purchased Palette digitizing software, but only worked with it for a few months.  Now, I'd like to revist the process of creating emboideries and appliques; and, since it's been so long, I'm going to have to start my education all over.  

Today I worked on creating a Sunbonnet Sue applique.  That is one of the quilts on my "to do someday" list so now's as good a time as ever.  It took me a while of reviewing my instructions book and tutorials to figure out just how to make the three pieces for this design.  The design I found had extra pieces for the hand and sleeve, but I thought it best to skip that for now.  I made the shoe, dress, and hat.  I was pleased with the stitch-out, but she just didn't look complete.  Next I digitized her hand as a fill stitch and then the sleeve as a satin stitch outline.  Lastly, I chose a motif stitch for the lace on her bonnet.


Sunbonnet Sue #1


A while back a friend gave me a whole bunch of fabric bits and pieces that had been used by someone else for crafts like placemats, etc.  Most of the colors are very 80's.....country blue, taupe, orange, and green.  I haven't been able to incorporate those fabrics into any of the quilts I've made lately, but this project is perfect.

I enjoyed digging through all the fabric bits and picking out ones that would look good as the dress and then find a complimentary or contrast fabric for the bonnet.  My assortment of embroidery thread is somewhat limited so I just picked colors that I thought would go well with the fabric.  

I'm not sure I like the sleeve the way I have it.  It might look better to make it a separate piece of fabric, but I don't know that I want to have to trim that small of a piece before stitching the satin stitch outline.  Perhaps I'll do another file and play with that idea.

Sunbonnet Sue #2
The thought of having all the Sues facing the same direction led me to create a second file where I mirrored the design.  
Sunbonnet Sue #3


At this point I'm not sure how many of these Sues I will make or how I will use them in a quilt.  That will be work for another day.  

Thanks for stopping by.
Linking up to:  Design Wall at Patchwork Times and Main Crush Monday at Cooking Up Quilts.

Happy Quilting

~Diane

Monday, April 6, 2015

Design Wall - April 6, 2015

Over the past few days, I've been working on another Quilt of Valor.  I'm using my "Stars-N-Stripes" design, but the blocks are set on-point.  The finished dimensions will be different as well because of the setting.

QOV Stars-N-Stripes On-point

For added interest, I'm alternating the colors of the floating star blocks. 

Blue Floating Star block
I really like the red and blue stars on white background fabric.  Unfortunately I don't have enough of that fabric for the borders I planned so I'll have to come up with a new plan when I get to that point.

Our local Quilts of Valor sew-in is coming up this Thursday, so I better head back to the sewing maching.  

Thanks for stopping by and Happy Quilting!

~  Diane


Related Posts Plugin for WordPress, Blogger...