About Me

My photo
Pacific Northwest, United States

Welcome

I've been crafting things for myself and others since my teen years. Designing and creating is not just what I do.....it's Who I Am. Thanks for stopping by.

Friday, January 31, 2014

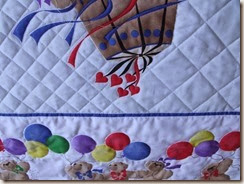
FMQ...“Bears In The Air” baby quilt

A while back I was given some baby quilt panels one of which is a Daisy Kingdom print of some teddy bears in a hot air balloon.  I matched this panel up with some dinosaur flannel because of both pieces have the primary red, blue, yellow, and green colors. 

After sandwiching these up with some 80/20 cotton low loft batting, I tried a new basting technique.  I did use spray baste to keep the layer secure while I added machine basting. 
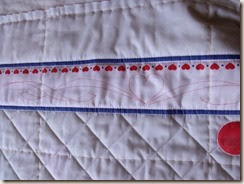
BITA-markingFirst I marked the approximate centerlines (vertical and horizontal) and then I proceeded to stitch those lines with a very long basting stitch and my free-motion foot.  I set my stitch length to 6, but I made it even longer by lowering the presser foot, taking a stitch, bringing up the needle, lifting the presser foot, and then moving the fabric.  I stitched this way about every 1/2- to 1-inch.  After a bit I got into a rhythm and was grateful for my new sewing machine knee-lift feature which raises and lowers the presser foot.  I spaced the stitching rows/columns about 6-inches apart.  The only thing that I would say negatively about this technique is that occasionally as I was free-motion quilting the basting thread would get caught in the presser foot.  In that case, I would stop and cut the basting thread and continue on with my quilting.


For the most part I used Coats & Clark 100% cotton 50wt thread for quilting with Presencia 60wt 3-ply cotton in the bobbin.  I have tried to use other brands of 60wt but they tend to fray or break perhaps because they are only 2-ply.   I also used various brands of colored thread, whatever I had on hand, to quilt the outlines around the balloons and ribbons.  I was concerned that if I used white it would show where two colors meet

BITA-hatchAnother first for me was the diagonal cross-hatching I did in the quilt interior.  At first I made the lines 2-inches apart, but later added the intermediate lines to make the spacing 1-inch.  I like the smaller hatch much better. 
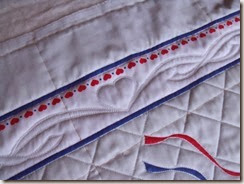


BITA-borderFor the interior border area I made my own design using hearts and ribbons which I marked using a Frixion pen.  When I quilted only a single line for these features it seemed dull so I added a second echo line about 1/16 to 1/8 inch away.  That made the ribbons and hearts stand out more.  I love how the Frixion pen markings just disappear when heat from the iron is applied. 
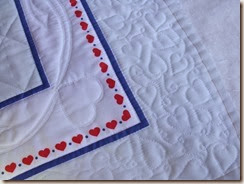


BITA-CornerIn the outside borders I quilted a simple hearts and loops design and tried not to get the quilting too dense.  I was concerned that some areas of the quilt would been heavily quilted and others very sparsely. 


DSCF1592-sm
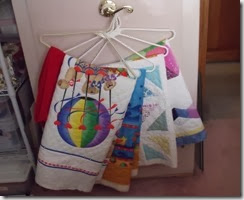
At the moment I have four baby quilts that are done except for the binding.  It’s funny, I’m enjoying seeing them hanging around together so much that I keep putting off the final step of adding the binding.  Each quilt has it binding all cut and pressed and ready to be applied.  I think I’ll just leave them there to admire a while longer......or I could finish them and hang them back up.  These will be donated in July.    

I'm linking up with FMQ Project Link Up over at The Free Motion Quilting Project.

Happy Quilting!
       ~Diane

Friday, January 17, 2014

FMQ ... Ahoy Baby quilt

A while back I was given several flannel pieces each measuring about 38" x 48".  I intend to use them as backings for the donation baby quilts I'm making.  Then another friend gave me a lot of fabric which she scored for free at an estate sale.  In that batch of fabric were nine baby quilt panels which I promptly washed and then matched up with flannel backings.  I'm hoping to get all of these small quilts completed by end of summer.


The first quilt, which I named "Ahoy" was a bit small so I added a 4-inch borders all around to the original panel.  I like all the really bright colors of this panel which has Paddington Bear sailing around in his boat.  

This week I assembled the backing, batting (Soft & Crafty 80/20 low loft), and panel.  Since there are no seams in the panel itself, I stitched the outline of the major areas using The Bottom Line  60 wt poly in the bobbin and So Fine 50 wt poly for the top thread.  For the interior of the panel I simply stitched the outline of the major elements.  

When it came time to quilt the borders I used my new Frixion pen to mark the waves, boats, clouds, and a sun in each corner.  I used matching gold thread for the stitching.  The markings disappeared when I applied heat from my iron.  

    
This quilt came together so easily that I almost immediately started on the next one.  Perhaps I will get all these baby panel quilts done before summer starts.  

Thanks for stopping by.   I'm linked up with FMQ Fridays over at The Free Motion Quilting Project.  

         Happy Quilting,

                 ~Diane


Friday, January 10, 2014

FMQ...Scrappy Baby Asterisk quilt


This week I was able to get the quilting completed on the Scrappy Baby Asterisk quilt.  Yeah!  

This baby quilt top has been sitting in my "To Quilt" pile for a couple of months.  I used leftover scraps from previous baby quilts. 

 Although you probably can't see it clearly, I used the white bubble fabric I got a while back for the sashing and outer border.  

 This is the third ? asterisk baby quilt I've made.  The pattern evolved from a Craftsy.com block of the month from 2012.  I've found that this is a good pattern to use up scrap bits.


Here's a pic of the completed top.


I used pins for basting the quilt sandwich together.  My preferred method is to use spray baste and then heat set it with an iron.  

But this time I followed Cindy Needham's technique of tensioning the quilt back and that worked really well...for the backing.  I did get some shifting with the top which showed up in lots of ripples when I did my ditching to secure all the layers.  Perhaps I didn't have my tensions set correctly with my walking foot.  


At any rate, I picked out all the stitching I had done, which took me the better part of a day.  After that I set my maching stitch to "baste" (6mm) and only stitched down the center of the sashing.

Then I stitched around each triangle using my quilting foot instead.  Yes, I had to go really slow to get a straight line, but I was glad I did and pleased with the results.  

I began with quilting flowers in each quadrant.
Later I decided that they needed more emphasis so I went back and echoed each flower.


I had a lot of fun making the bubbles in the sashing.  I didn't want to overquilt that area so I did a single column with larger bubbles in the intersections.

For the outer border I did a simple accordian style wavy line.  It was hard not to try to make straignt lines with equal spacing in between, but I forced myself to go "Organic".


"Organic" is my new mantra this season in my quilting journey.  I define this concept as:  not structured, not perfect.   

I'm linked up with FMQ Project Link-up over at The Free-Motion Quilting Project.  

Thanks for stopping by.            Happy Quilting!
                 ~Diane


Monday, January 6, 2014

Design Wall - January 6, 2014


With the local Quilts of Valor sew-in coming up this week, I thought I'd better get working on this.   You can read my previous blog post about this quilt top Here.

Original design plan
I took my friend Dot's advice and decided to set the blocks on point.  Then I made four more blocks for the corners.  Some of my decisions were based on the amount of fabric on hand.  I was determined not to go out and buy more fabric but to use what I have.  

When I calculated the side setting triangles, I made them expecting to cut the small red cornerstones in half as shown in the pic.  But as it turned out I was able to keep those cornerstones and only clip off the points, which makes the quilt interior a bit larger (almost 48" square) and that's good.  

I also changed the width of the white inner border because I didn't have enough to cut the strips as wide as planned.  Today I'm hoping to finish mitering the wide (6") red outer borders.  This quilt should finish at about 60" x 80".  

I'm linked up with Patchwork Times Design Wall Monday.


Thanks for stopping by and Happy Quilting!  
      ~Diane

Friday, January 3, 2014

Free-Motion Quilting....03 January, 2014

For Christmas I treated myself to a few more Craftsy.com online classes.  I love the Craftsy platform which allows you to watch the instructional videos at your own pace, as often as you want.  I enjoy reading all the questions posted by students as well as the responses by the instructors.  

One of my new classes is "Design It, Quilt It" taught by Cindy Needham.  I've taken several quilting and sewing classes and Cindy is my favorite instructor by far.  She shares a wealth of knowledge and expertise in a way that is not overwhelming.  I appreciate all her insights and personal suggestions.  But most of all she encourages and inspires me to go fire up the machine, experiment and "make it my own".  If you ever have opportunity to take a class from Cindy I highly recommend you jump at the chance.  She's an awesome teacher.

I put together a quilt sandwich of a couple pieces of tea-dyed muslin and some Warm and Natural cotton batting.  The first picture is my swirls and curls practice as I experimented with machine speed, looking for that perfect combination of speed and fabric movement to achieve a consistent stitch length.  I added a bit of grid work and a small feather before launching into the "S" curves.  

We were supposed to stitch a feather/teardrop shape and then subdivide it with an "S" curve shape or two.  Next we were to fill in the smaller area with "S" curves.  They end up looking a lot like skinny fern leaves.  As suggested, I added a spine of circles between the areas and around the outside.  I had never done "S" curves as a filler before and it took a little getting used to.


In the next section of practice I drew grid lines (my ruler's width) and filled the spaces with repetitive lines.  This piece is small enough that I could turn the piece to get straighter lines.  I find it difficult to stitch a straight line when moving the fabric horizontally (side to side).   I also tried some diagonal lines and square spirals.

After doing a column of circles, I experimented with more "S".  I changed direction and added a bud shape in the middle.  The end result is a row of flowers (like tulips) that I could use in a sashing or border area. Then I made a large feather.  After stitching the feathers on the left side of the stem I echoed each feather on the outside as I worked my way back down to the bottom of the stem.  I like the result.  The feathers stand out more than they do without the echoing.  


I also did another column of circles without drawing guidelines.  That's probably the reason why the sizes vary so much.  But I did like the echo lines I put next to the circles.  

Another new-to-me fill is the cathedral windows grid.  First I stitched my 1" square grid then added the arches.  I'm calling them pedals because, when you finish, they look like flower pedals that touch each other with little pillows in between.  In the center portion I subdivided the area between the pedals which made it lie really flat.  Last of all, I switched to a thinner, darker shade of thread to do the scribbling between the pedals.  I had some thread breakage issues until I got the tension set properly.  The scribbling makes the pedals pop and adds some shadow effect.  There are still some more grid styles I'd like to try.....1/2-inch and 1/4-inch diagonal grids for example.  

Well, that's what I've been doing over my holiday vacation.  Be sure to stop over at The Free-Motion Quilting Project for more links to free-motion quilting.  

Thanks for stopping by today.  Happy Quilting!
         ~Diane
Related Posts Plugin for WordPress, Blogger...